Potholder
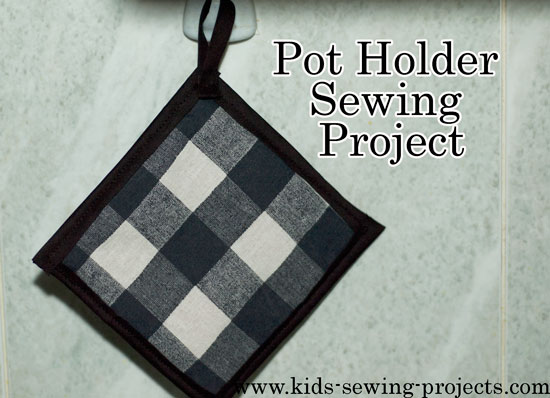
Sewing Pot Holders
Potholders can come in all sizes and colors. Here are instructions on how to sew an easy pot holder.You will need:
Sewing Materials Available

Simple Potholder Project Tutorial Directions
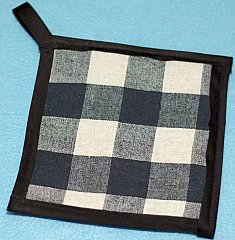
Place two pieces of felt in between the two pieces of fabric with the fabric right sides facing out. Pin bias tape all around edges. One side of the tape should be on one side of the material and the other side of the bias tape should be on the back side of the material.Learn more about binding edges with bias tape.
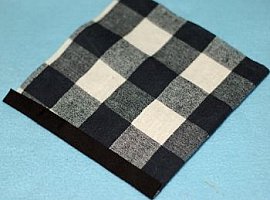
Sew in place. Make a loop out of bias tape and sew in the corner.
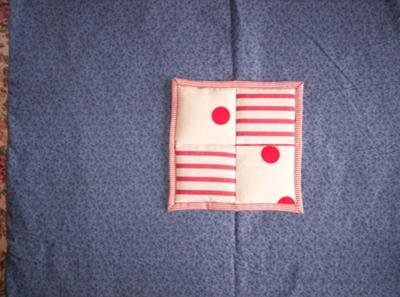
Quilted Potholder
by Carla (Minnesota)This project was designed for a Girl Scout Sewing Day. The girls participating were in grades 3 and up, and they had a great time learning how to use a sewing machine.
Fabric Needed:
- One 10-inch square of cotton fabric (back)
- Two 8 ½ x 4 ¼ inch pieces cotton fabric (top)
- One 8-inch square of cotton batting (middle)
- One 8-inch square of Insul-Bright (middle)
2. Press seam toward one side.
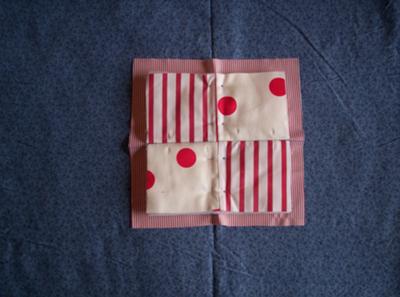
3. Cut pieces just sewn together in half (4 ¼ inches). Flip one strip around so squares are in opposite directions. (See Photo 4 for placement.)
4. Pin pieces along one side, with right sides together. Align pieces so centers meet. Sew together.
5. Press seam toward one side. Set top piece aside.
6. Take large fabric square and place insul-bright in center. Work clockwise around the square. Beginning at center of one edge, fold fabric to meet insul-bright and pin in place. At corners fold fabric to make a triangle. Continue to work around square.
7. Press folded edges. Remove pins and open up the fold just made.
8. Make a fabric sandwich. Layer pieces in the following order.
10 inch square (right side facing down)
8 inch square insul-bright
8 inch square batting
8 inch square top piece (right side facing up)
9. Place four pins along one center seam. Begin and end stitching line at edges of top fabric piece, and stitch in the ditch down center seam. Be sure to backstitch at ends.
10. Repeat Step 9 with remaining center seam.
11. Pin corners and edges of the top of your sandwich down through all layers.
12. Using pressed seams created in Step 6 and 7 on the bottom fabric piece, you will now make the self-binding edges for the potholder. Fold edges on bottom piece of fabric towards sandwich layer just like before, then fold again up and over the top of your sandwich. Pin folded edge to top layer, keeping pins close to inner edge. Remove extra pins used in Step 7.
13. Beginning along one edge and continuing around the square, top stitch the self-binding just created. Keep seam near inner edge of folded over fabric. At corners, make sure needle is in the fabric then lift up pressure foot to turn corner. Put foot down and continue sewing. Back stitch at end.
Related Beginning Projects:
~Beginning Lessons, ~Bandanna Tote Bag with an Inside Lining, ~Sew a Simple Belt, ~Bottle Bag, ~Christmas Stockings, ~Circle Pillow,~ Coasters, ~Couch Caddy, ~Dinner Placemat, ~Dress Up Your Jeans, Foam Pencil Case, ~Gathered Apron,~Hair Scrunchy, ~How to Sew Drawstring Bags, ~How to Sew Tote Bags, ~Jean Purse, ~Jean Apron, ~Lap Desk, ~Neck Pillow, ~Patchwork Tote Bag, ~Patchwork Pillow Cover, ~Pillow with Pocket, ~Pillow Cover with Ties, ~Pillow with Trim,~Pocket Purse,~ Sew a Pot Holder, ~Stuffed Animal, ~ Stuffed Ball, ~T-shirt Drawstring Bag, ~Sew a Card, ~No Sew Projects, ~Sewing Safety, ~Felt Patterns~Pillowcase Scarf, ~Felt Tooth Fairy, ~Stuffed Elephant, ~Stuffed Monster,~ Pretty Purse, ~Mini Stuffed Dog, ~Stuffed Bear, ~Baby Receiving Blanket,~ Baby doll blanket & pillow,~Patchwork Skirt, ~Reusable Snack Baggie, ~Glasses Case, ~Sew Tablecloth, ~ Pocket Pillow
Follow Kids Sewing Projects


[?] Subscribe To This Site

Copyright, Debbie Madson, Madson Web Publishing, LLC
All rights reserved.
The material on this site is for educational purposes.
Nothing on this page is public domain.

All rights reserved.
The material on this site is for educational purposes.
Nothing on this page is public domain.