Felt Organizer
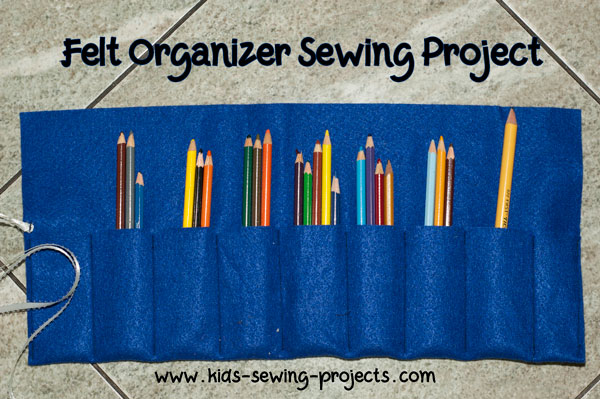
This Felt Organizer is so versatile that you can use it to store pencils, markers, paintbrushes or use it as a sewing case. However you use it, it is an easy beginner sewing project.
You will need:
Sewing Materials Available

Sewing an Organizer
Fold bottom end of the felt up 4 inches. Pin in place. Stitch along
each side.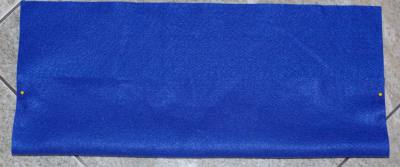
With a measuring tape place a pin every 2 inches.
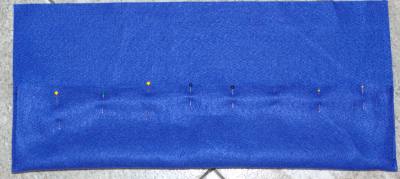
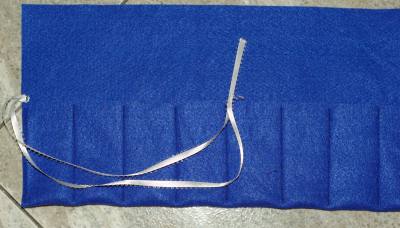
Make pockets by stitching down the center where each pin is. Don't forget to backstitch at the beginning and end. Fold your ribbon in half and pin the center to one side. Stitch the ribbon in place.
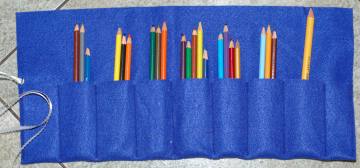
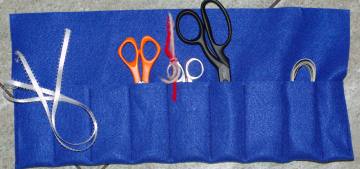
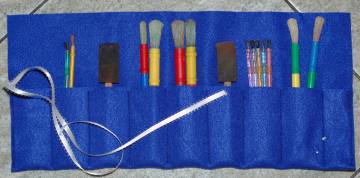
You can keep your sewing supplies in the pockets or store pencils and markers for a pencil case. Here are some examples...
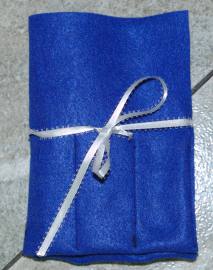
Fold up and tie in front. You can also decorate the front by gluing pieces cut out of felt, ribbon or add beads to your ribbon.
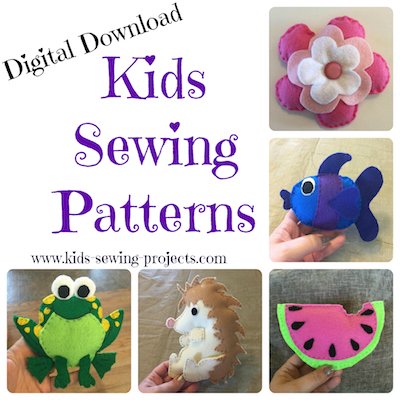
Need a fun hand sewing project?
Felt Sewing Patterns!
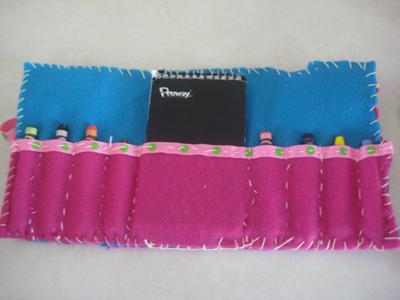
Hand Sewn Crayon and Notepad Holder
by Emy LeFevre (Chubbuck, Idaho, USA)This simple and useful felt organizer project uses three different hand sewing stitches. And with the freedom to design your own color scheme and appliqué design each project is charming and unique.
Materials:
- 6" by 12" piece of felt for outside
- 6" by 12" piece of felt for inside
- 3" by 12" piece of felt for pocket
- Two 13" lengths of 3/8" ribbon
- 1 Button with a shank
- Extra felt pieces for outside appliqué
- #10 crochet thread
- Large yarn darner needle
- Scissors
- 1 3" by 5" notepad
- 8 Crayons
Step 1:
With a running stitch sew one of the 13" lengths of ribbon to the top edge of the pocket.
Step 2:
Mark sewing lines for crayon pockets about an inch apart with a 3 1/4" pocket in the middle for the notepad.
Step 3:
With a running stitch sew the crayon/notepad pockets to the inside piece of felt.
Step 4:
Create appliqué design for outside with felt pieces.
Step 5:
Pin appliqué design to the outside piece of felt and tuck the second 13" ribbon underneath. This ribbon will wrap around the holder to the button to keep it closed.
Step 6:
With a back stitch sew appliqué design and ribbon to the outside piece of felt.

Step 7:
Sew button to the outside piece.
Step 8:
With a whip stitch or blanket stitch attach the outside to the inside/pocket. Make sure to fold the ends of the ribbon on the pocket in between the outside and inside pieces to hide the edges and make it look nice.
Step 9:
Fill crayon holder with crayons and notepad. Measure outside ribbon around the holder to the button. Sew a loop in the ribbon so it can hook around the button.
Step 9:
Trim ribbon end and finish with fray check or paint with clear nail polish so it doesn't fray.
Related Beginner Projects:
~Pre Beginner Lessons, ~ Sew Bean Bags, ~ Cell phone holder, ~Sew ornaments, ~ Easy Snowman Craft, ~ Easy Dishtowel Apron, ~ Felt Organizer, ~ Fleece Hat, ~ Heating Pad, ~ How to sew a pillowcase, ~ iPod holder, ~ Potpourri pillows, ~ Pillow with Pocket, ~ Pillowcase Apron, ~ Pin Cushion, ~Rectangle shape pillow, ~Traveling Sew Kit, ~Stuffed Kittens, T Shirt Fringe Bag ~Tie Belt, ~ Stuffed Fatties Ball Animals,, ~Mouse Cat Toy, ~Hand Sew Potholder,
Follow Kids Sewing Projects


[?] Subscribe To This Site

Copyright, Debbie Madson, Madson Web Publishing, LLC
All rights reserved.
The material on this site is for educational purposes.
Nothing on this page is public domain.

All rights reserved.
The material on this site is for educational purposes.
Nothing on this page is public domain.