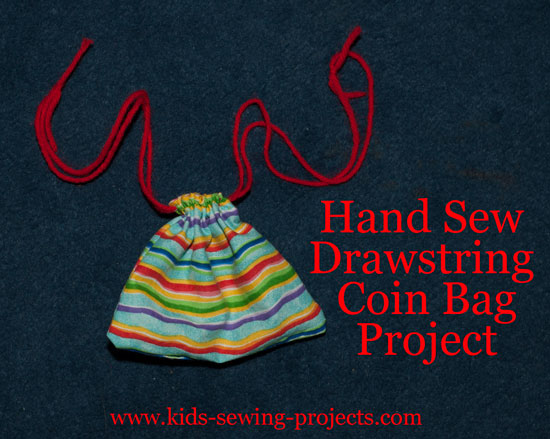
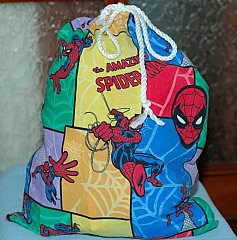
Drawstring Bag
You will need for this drawstring bag:
- 2- 5 x 5 inch squares of fabric
- Needle and thread
- 2-30 inches pieces of yarn and a large yarn needle
Sewing Materials Available

Sewing a small bag with a drawstring
Cut out 2 - 5 inch squares of fabric. Put right sides together. Right sides are the sides with the design on them. These sides will be showing when you finish the project.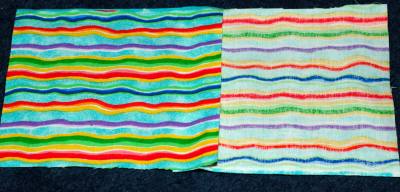 Right side/Wrong side
Sew along sides of fabric leaving the top open. Use a straight running stitch with your stitches close together. Once you have finished the sides. Turn the top down ¼ -1/2 inch and sew a straight stitch along the bottom. Be srue you only sew through one side.

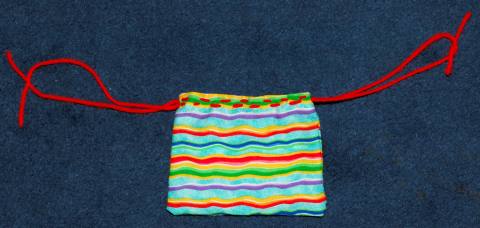
Turn material right side out.
Thread yarn with a large needle but don't tie the end. With the yarn, stitch a straight stitch along the top edges leaving excess at the beginning and at the end. Tie ends together. Stitch another row of yarn under the first row making sure you leave excess yarn at the beginning and end. Tie ends when you reach the end.
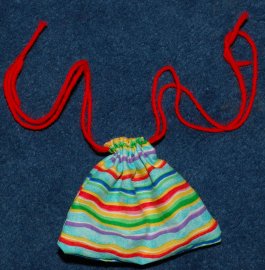
You can pull the yarn to close the bag.
**Later on this project can be done easily on the sewing machine. We practiced hand stitching in Level 1.
Making your own draw string bag
by Kylie Briggs (Moura QLD)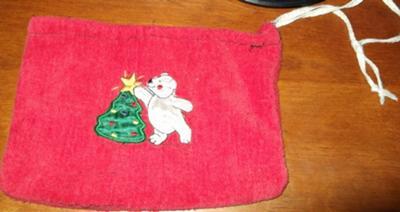
Steps to making your own draw string bag
1. Please get the following:
- 1 colored hand towel of your choice
- a safety pin
- round head pins
- needle/sewing machine
- Cotton to match color of hand towel
- a felt picture of your choice
- draw string preferably white
- scissors
- tape measure or a ruler
3. Then fold the laid out hand towel in half.
4. Now get your felt picture and place wherever you think it looks best pin to one side of hand towel.
5. Once you have pinned it down get your needle and cotton and sew around the edges in blanket stitch.
6. Once the hand towel is folded sew all the way through both sides.
7. Now repeat on the other side.
8. Then fold over the top of hand towel about 3cm.
9. Then sew all the way around leaving a space of 2cm so you can thread your draw string through.
10. When you have finished doing that get your draw string and a safety pin.
11. Put your safety pin through one end of the draw string.
12. Then thread the draw string through the opening of the hem.
13. Leaving both ends of the draw strings out of either end so you can see them.
14. Remove safety pin from draw string.
15. Then get both ends of the draw strings and tie them in a knot.
16. Then pull them tight until you have closed off the top of your bag.
And now you have made your own draw string bag to put a number of different items in. (This bag can be used to put tablets in or can even be used as a toiletry bag)
Would you like more advanced instructions from Level 3 on sewing a drawstring bag on the sewing machine?
Related Hand Sewing Projects:
Pre Beginner Lessons Level 1, ~Drawstring Coin Bag, ~Basic hand stitches, ~Hand Sewing Felt Patterns, ~Button Flower~ Draft Critter, ~ Felt Bookmark, ~ Felt Mittens, ~ Needle Book, ~ Treasure Stick Bags, ~Key Chain Animal, ~Puppet Gloves, ~ Hand sewn teddy bear sleeping bag & pillow, ~Halloween Totes, ~Backpack Charms, ~Rag Doll, ~Button Flower, ~Sew Ornaments, ~Sew Felt Doll,
Follow Kids Sewing Projects


[?] Subscribe To This Site

Copyright, Debbie Madson, Madson Web Publishing, LLC
All rights reserved.
The material on this site is for educational purposes.
Nothing on this page is public domain.

All rights reserved.
The material on this site is for educational purposes.
Nothing on this page is public domain.