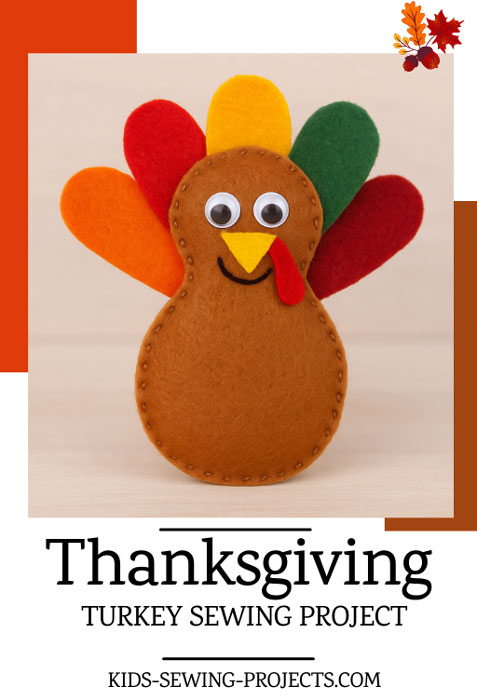
Felt Turkey Sewing Project
A simple Thanksgiving sewing craft for kids!
This adorable felt turkey "pocket pal" is easy to sew and makes a fun holiday decoration, bookmark, or small toy. Kids can personalize their turkey with different feather colors, buttons, or fabric scraps.
Sewing Materials Available

Materials Needed
- Brown felt (for turkey body)
- Assorted felt colors (for feathers)
- Needle and thread
- Fabric glue (optional for younger kids)
- Scissors
- Googly eyes or small felt circles for eyes
- Small buttons (optional)
- Stuffing (a tiny amount - a cotton ball works great!)
Directions
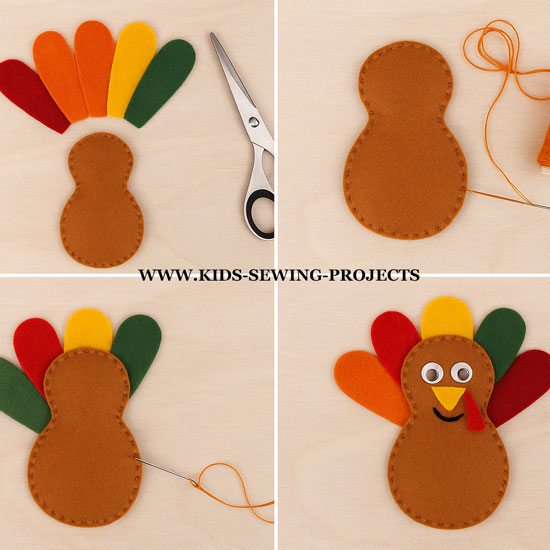
1. Cut Your Shapes
Cut the following shapes from felt:- 2 matching turkey body shapes (simple oval or peanut shape)
- 5-7 feather shapes in bright, assorted colors
- 1 small yellow triangle for the beak
- 1 small red wattle shape (optional, but very cute!)
2. Decorate the Front Body Piece
Before sewing the body together:- Glue or stitch on the googly eyes.
- Add the beak and wattle to the front body piece.
- Use embroidery thread to stitch a smile, or draw a smile with a fabric marker.
3. Attach the Feathers
Lay the feathers along the top edge of the back body piece, pointing outward like a fan.Pin the feathers in place so they dont move while sewing.
4. Sew the Body Together
Place the decorated front body piece on top of the feathered back piece, with the feathers sandwiched between the two body pieces at the top.Then sew around the edges using one of these stitches:
- Running stitch
- Whip stitch
- Blanket stitch (for more advanced kids)
5. Lightly Stuff the Turkey
Add a tiny bit of stuffing through the opening - just enough to make it soft and a little puffy.Once it is stuffed, sew the opening closed with small stitches.
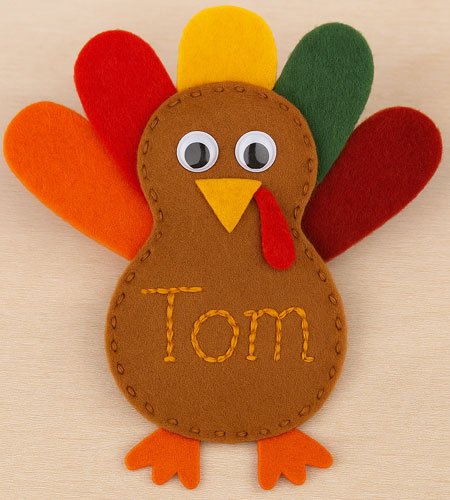
6. Optional Add-Ons
Kids can add extra details to make each turkey unique:- Add a ribbon loop to turn it into a hanging ornament.
- Sew a loop on the back to use it as a pencil topper.
- Add Velcro on the back so the turkey can stick to a felt board.
- Stitch a name on the front to use it as a place setting for Thanksgiving dinner.
Finished!
Kids now have an adorable Thanksgiving turkey made from simple hand-sewing steps. This project is perfect for classrooms, sewing clubs, holiday activities, or a quick family craft before Thanksgiving dinner.Follow Kids Sewing Projects


[?] Subscribe To This Site

Copyright, Debbie Madson, Madson Web Publishing, LLC
All rights reserved.
The material on this site is for educational purposes.
Nothing on this page is public domain.

All rights reserved.
The material on this site is for educational purposes.
Nothing on this page is public domain.