Fabric Wrist Cuffs or Bracelets
by CT
An easy sewing project for kids with a stylish, wearable finish!
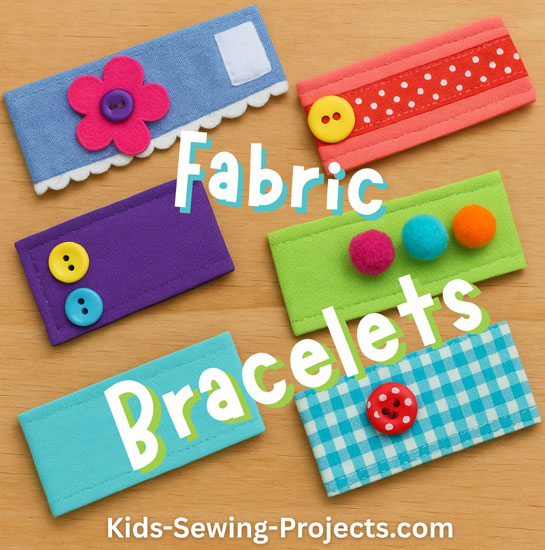
Fabric wrist cuffs are a fun way for kids to show their creativity. They sew up quickly, use only small pieces of fabric, and can be decorated in endless ways—buttons, Velcro, embroidery, beads, fabric paint, patches, and more!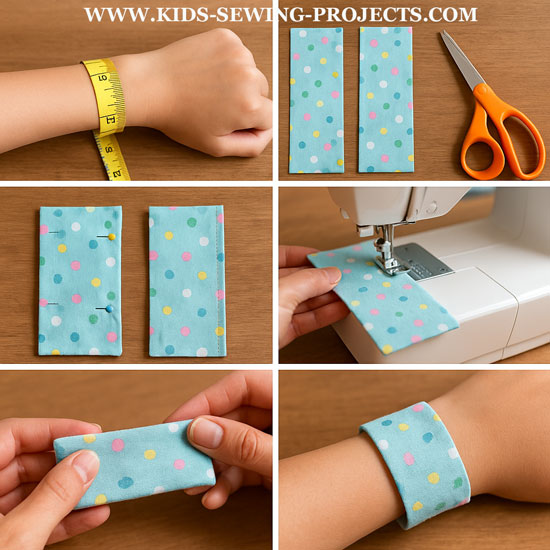
Materials Needed
- Small fabric scraps (cotton or felt works well)
- Matching or contrasting thread
- Sewing machine or hand-sewing needle
- Fabric scissors
- Pins or clips
- Ruler or measuring tape
- Iron (optional but helpful)
- Velcro (sew-on type) or small buttons & buttonhole elastic
- Optional: ribbon, felt shapes, pom-poms, fabric markers, or decorative trims
Step-by-Step Instructions
1. Measure the Wrist
Have the child wrap a measuring tape around their wrist.
Add 1 inch to this measurement for comfort and finishing.
This is the length of the cuff.
Most cuffs end up around 7–8 inches long and 1.5–2 inches wide.
2. Cut the Fabric
Cut two fabric rectangles using the wrist measurement:
Length: wrist size + 1"
Width: 2"–3" (depending on preferred thickness)
For example:
Wrist measurement: 6.5"
Fabric cut size: 7.5" × 2"
If using felt, you only need one layer—felt doesn’t fray.
3. Layer and Pin
Place the two rectangles right sides together.
Pin or clip around the edges.
4. Sew Around the Edges
Using a ¼" seam allowance:
Sew all the way around the rectangle
Leave a 1-inch opening on one long side
Backstitch at the beginning and end.
5. Turn Right Side Out
Turn the cuff right side out through the opening.
Use a pencil or chopstick to push out the corners.
Press with an iron to make the edges crisp.
6. Topstitch (Optional but recommended)
Sew around all four sides close to the edge (⅛"), closing the opening as you sew.
This gives your cuff a clean, professional look.
7. Add the Closure
Choose between:
Velcro Closure
Cut a small piece of sew-on Velcro
Sew one piece to the top of one end
Sew the matching piece to the underside of the opposite end
Make sure they line up!
Button Closure
Sew a button on one end
Sew a small loop of elastic or ribbon on the opposite end
OR
Make a simple buttonhole if kids are ready for that skill
8. Decorate! (The Fun Part!)
Let kids personalize their bracelet by adding:
- Felt shapes
- Buttons or beads
- Iron-on patches
- Hand embroidery
- Fabric paint or markers
- Ruffles, lace, or ribbon
Finished!
Kids can now wear their stylish new fabric bracelet or make more to give as gifts. This project teaches measuring, sewing straight lines, turning, topstitching, and basic closures—all important beginner sewing skills.
Sewing Materials Available

[?] Subscribe To This Site

Copyright, Debbie Madson, Madson Web Publishing, LLC
All rights reserved.
The material on this site is for educational purposes.
Nothing on this page is public domain.

All rights reserved.
The material on this site is for educational purposes.
Nothing on this page is public domain.