Fabric Gift Card Holder Tutorial
A fabric gift card holder is a quick, fun project kids can sew. It turns a simple gift card
into a thoughtful handmade present! These sew up in minutes and can be reused again and again.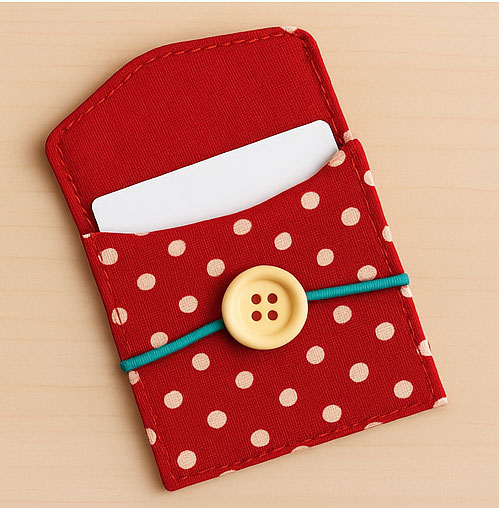
Supplies You’ll Need
- Cotton fabric scraps (great for using leftovers!)
- Lining fabric (optional but looks nice)
- Felt (optional alternative to lining)
- Sewing machine or needle for hand sewing
- Thread
- Pins or clips
- Scissors
- Iron
- Button and elastic loop
- Velcro
- Ribbon or trim
- Appliqué shapes
Step-by-Step Fabric Gift Card Holder Tutorial
1. Cut Your Fabric
Cut these pieces:- Outer fabric: 5"; x 7";
- Lining fabric: 5"; x 7";
perfectly to hold a standard gift card.
2. Layer the Pieces
Place the outer fabric and lining right sides together. Pin or clip around the edges. If using felt: layer the outer fabric on top of the felt (right side up). No need for right sides together.3. Sew Around the Edges
Sew with a ¼" seam allowance around all four sides, leaving a2" opening on one side for turning.
4. Turn and Press
Turn the rectangle right side out through the opening. Push out the corners using a pencil or chopstick, then press the piece flat with an iron.5. Topstitch the Edges
Topstitch around the entire rectangle. This closes the opening and makes the edges look crisp and neat.6. Fold to Create the Pocket
Place the rectangle horizontally. Fold the bottom edge upward about 2½ inches to form the gift card pocket. Clip or pin the sides to hold the fold in place.7. Sew the Sides
Sew along both sides of the folded section to secure the pocket. Backstitch at the top of each side to keep the seams strong.8. Add a Closure (Optional)
Choose one of these options:Velcro
- Sew a small piece of Velcro where the top flap meets the pocket so it can close securely.
Button + Loop
- Sew a button on the front pocket.
- Sew an elastic loop centered on the top flap so it can hook around the button.
Ribbon Tie
- Sew ribbon ends to both sides of the flap so it can tie closed.
9. Decorate (Optional)
Kids can personalize their holders with:- Felt appliqués (star, heart, snowflake, initial)
- Fabric markers
- Iron-on patches
- Decorative stitching
10. Insert the Gift Card!
Slide the gift card into the pocket and fold the flap down. You now have acute, reusable, handmade gift card holder!
Perfect for:
- 🎄 Christmas
- 🎂 Birthdays
- 🍎 Teacher gifts
- 💌 Thank-you surprises
Sewing Materials Available

[?] Subscribe To This Site

Copyright, Debbie Madson, Madson Web Publishing, LLC
All rights reserved.
The material on this site is for educational purposes.
Nothing on this page is public domain.

All rights reserved.
The material on this site is for educational purposes.
Nothing on this page is public domain.