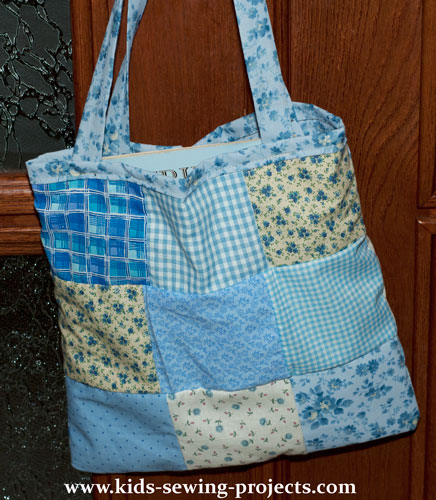
Patchwork Tote Bag
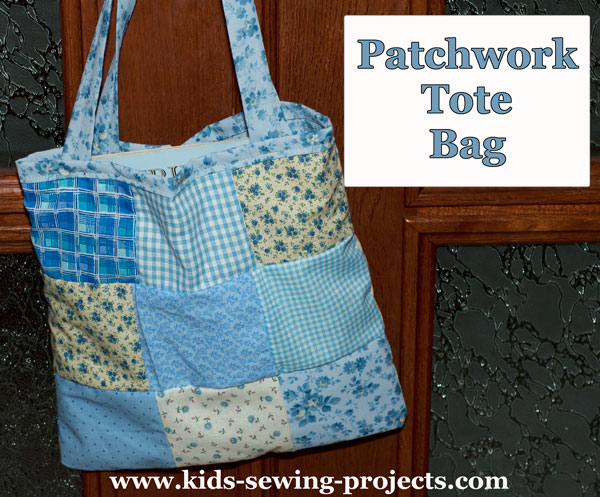
For this Tote Bag project you will need:
- 1/4 yard each of 4-5 different fabric
- 2- 13 ½ inch pieces of fabric for lining
- 2- 2 ½ x 24 inch strips of material for straps
Sewing Materials Available

Sewing a Tote Bag Tutorial
Cut your ¼ yard of fabric in 4 ½ x 4 ½ inch squares.
Arrange your different squares as you'd like them to be laid out. Sew 6 squares together to make one strip by sewing one end to the next, to the next, etc. Sew them with the right sides together. Make 3 strips of 6 squares. Once your 3 strips are done lay them out again the way you'd like it.
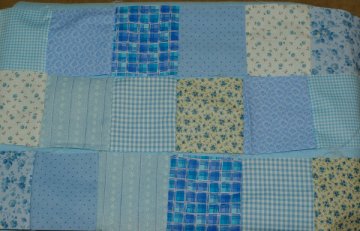
Pin together Row 1 to Row 2, right sides together, matching squares up. Sew together taking out pins as you go. Continue with Row 3. Now you have a rectangle, fold in half right sides together. Measure, if your rectangle is smaller than 13 inches, cut lining pieces to equal size of outside bag. Sew side and bottom together of patchwork tote.

Use your presser foot guide to keep an even straight line.
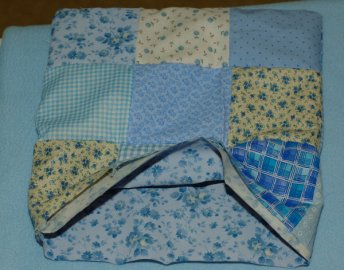
***We pinned our bag with the lining showing out, just for fun, or you can fold it inside also.
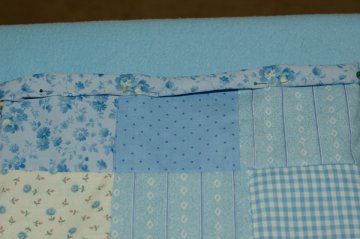
Make straps by taking your 2 1/2 x 13 1/2 inch material and place them right sides together. Sew along long edge. Turn inside out. Attach handles to middle of front and back.
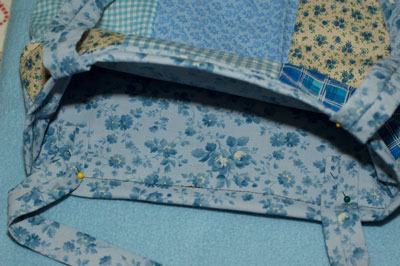
Pin in place and sew.
Need a fun hand sewing project?
Felt Sewing Patterns!
Patchwork Tote Bag
by Susan Hupkens (Netherlands)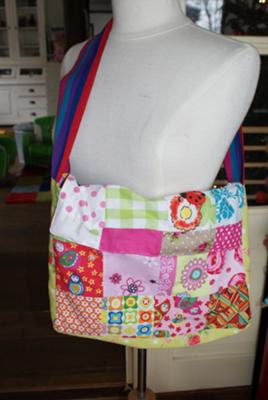
Using all little squares of fabric (10x10cm), you can easily make the nicest patchwork tote bag from any pattern available. My 7 year old daughter made this bag and it is now already her favorite.
1 - Sew together 3x4 squares (the front)
2 - Sew together 5x4 squares (the back + closure)
3 - Sew a long piece of fabric between the front & back (this is the bottom & the sides)
4 - Make the same bag from plain fabric (front of the size of 3x4sq, back of size of 5x4sq and the sides/bottom).
5 - Fit the bags into each other with the nice sides facing together on the inside.
6 - Sew the front top & around the closure. Leave the short sides open
7 - Turn the bag the right way through one of the two holes
8 - Fit the "strap" in the two holes & sew it to the bag
9 - If you like you can add buttons to the closure or just leave it as it is.
More Tote Bag Tutorials
For a tote bag without a lining see these sew a tote bag instructions.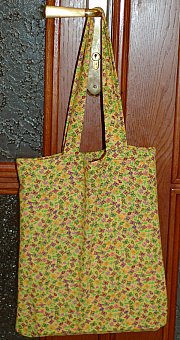
A smaller size bag makes a great goodie bag for a party.
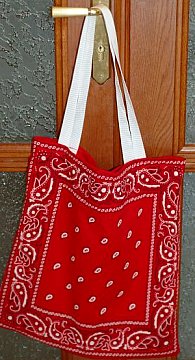
Bandana Tote Bag- turn bandanas into a tote bag
Related Beginning Projects:
~Beginning Lessons, ~Bandanna Tote Bag with an Inside Lining, ~Sew a Simple Belt, ~Bottle Bag, ~Christmas Stockings, ~Circle Pillow,~ Couch Caddy, ~Dinner Placemat, ~Dress Up Your Jeans, Foam Pencil Case, ~Gathered Apron,~Hair Scrunchy, ~How to Sew Drawstring Bags, ~How to Sew Tote Bags, ~Jean Purse, ~Jean Apron, ~Lap Desk, ~Neck Pillow, ~Patchwork Tote Bag, ~Patchwork Pillow Cover, ~Pillow Cover with Ties, ~Pillow with Trim,~Pocket Purse,~ Sew a Pot Holder, ~Stuffed Animal, ~ Stuffed Ball, ~T-shirt Drawstring Bag, ~Sew a Card, ~No Sew Projects, ~Sewing Safety, ~Felt Patterns~Pillowcase Scarf, ~Felt Tooth Fairy, ~Stuffed Elephant, ~Stuffed Monster,~ Pretty Purse, ~Mini Stuffed Dog, ~Stuffed Bear, ~Baby Receiving Blanket,~ Baby doll blanket & pillow,~Patchwork Skirt, ~Reusable Snack Baggie, ~Glasses Case, ~Sew Tablecloth, ~ Pocket Pillow
Follow Kids Sewing Projects


[?] Subscribe To This Site

Copyright 2007-2024, Debbie Madson, Madson Web Publishing, LLC
All rights reserved.
The material on this site is for educational purposes.
Nothing on this page is public domain.

All rights reserved.
The material on this site is for educational purposes.
Nothing on this page is public domain.