Easy Snowman
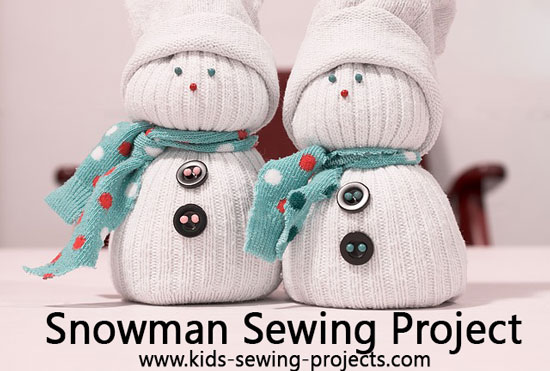
Two easy snowman projects using recycled materials, a tin can or a white sock.
Sewing Materials Available

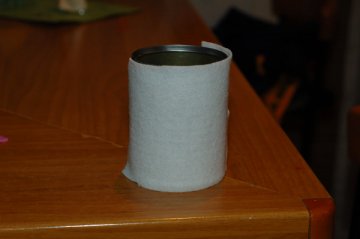
Creating a Snowman from a Tin Can
For this Easy Snowman project you will need:- 10 ½ x 4 ½ inch clean empty aluminum can (a bigger fatter can)* if using different size you will need to change measurements below
- 10 ½ x 4 ½ inch piece of white felt, white fleece or white flannel
- 10 ½x 6 inch piece of fleece (hat)
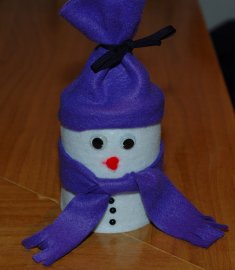
- 21 x 2 inch piece of fleece (scarf)
- eyes, buttons, pompoms for face and decorations
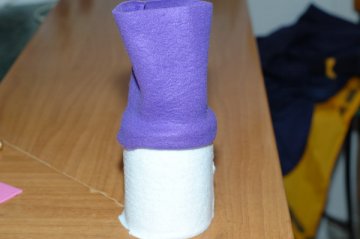
To make a hat take your 10 ½ x 6 inch piece of fleece, sew edges together. Stretch over top of can. Tie with a piece of string.

Glue eyes, nose and buttons in place. Tie your scarf around the middle of your can. Fringe edges of your scarf.
Creating a Sock Snowman
Lay a sock flat and position buttons, nose and eyes where you'd like them to be. Hand sew on. Add stuffing to fill your sock. Tie the end with a knot. Fluff the opposite end of the sock where your eyes and nose are and tie a scrap of material around to form a head.
Related Beginner Projects:
~Pre Beginner Lessons, ~ Sew Bean Bags, ~ Cell phone holder, ~Sew ornaments, ~ Easy Snowman Craft, ~ Easy Dishtowel Apron, ~ Felt Organizer, ~ Fleece Hat, ~ Heating Pad, ~ How to sew a pillowcase, ~ iPod holder, ~ Potpourri pillows, ~ Pillowcase Apron, ~ Pin Cushion, ~Rectangle shape pillow, ~Traveling Sew Kit, ~Stuffed Kittens, T Shirt Fringe Bag ~Tie Belt, ~ Stuffed Fatties Ball Animals,, ~Mouse Cat Toy, ~Hand Sew Potholder,
Follow Kids Sewing Projects


[?] Subscribe To This Site

Copyright 2007-2024, Debbie Madson, Madson Web Publishing, LLC
All rights reserved.
The material on this site is for educational purposes.
Nothing on this page is public domain.

All rights reserved.
The material on this site is for educational purposes.
Nothing on this page is public domain.