Beginning Sewing Projects
In this Level 3, beginning sewing projects and lessons, kids will move beyond making straight stitches on the sewing machines by practicing curves, corners and the gathering stitch. For each lesson we have an easy sewing project to practice the skill learned.

Sewing Materials Available

Free Online Sewing Classes
Beginning Sewing- Project 1- Sewing Safety and Scissor Projects
See these 10 Tips for Teaching Kids To SewCheck out our sewing safety page first.
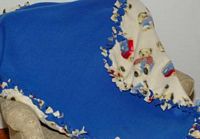
Then try some scissor projects to practice using and cutting with sewing scissors. These no-sew projects include tying a fleece blanket, making a fleece scarf and more.
Beginning Sewing- Project 2- Continue Hand Sewing
Continue hand sewing and try hiding the stitches in your seam. Hiding your stitches in the seam is sewing so your stitches are not visible. After practicing hand sewing, do the following project, Sew a Lap Desk project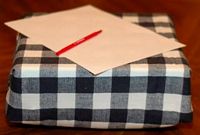
Try these hand sewing Felt Patterns!
Beginning Sewing Project 3- Mending by Hand or with a Machine
Keep mending things either by hand or on the sewing machine. In our last level Kids Sewing Lessons we mended by hand. Try mending clothes or other items with the sewing machine. Kids think it's pretty cool that they can fix things by sewing. After mending a few items, try this kids beginning sewing project, Sew a hair scrunchy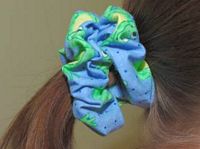
Beginning Sewing Project 4 - How to Sew Curves
Now you will practice sewing wide curves on the machine. It might be easier at first to draw a line on scrap material then follow the line with your sewing. Draw a line with a fabric pencil or chalk.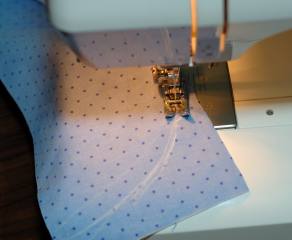
Work toward using the foot on the machine as your guide instead of your line. It is a great idea to use scrap material and just continue practicing. This way, you can learn what the machine will do and what you need to do without worrying so much about doing it right.
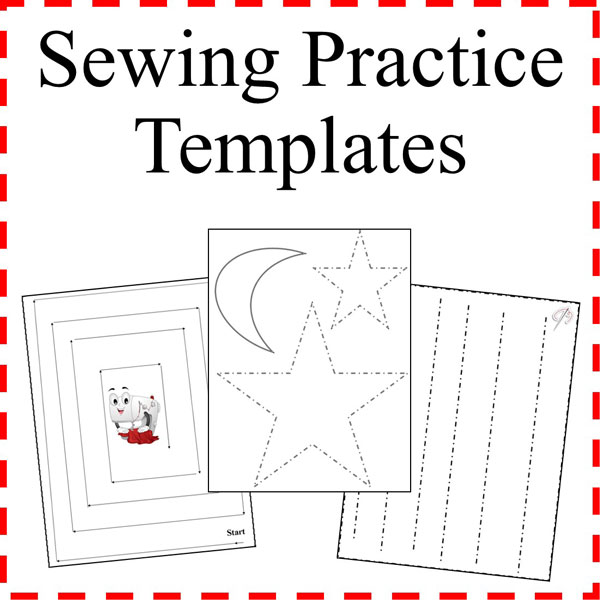
We have sewing templates to practice sewing curves.
We have sewing templates to practice sewing lines and curves in our Curriculum Set.
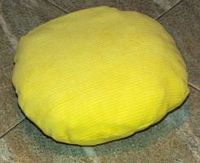
Once you've had lots of practice you can move on to this kids sewing project, sewing a circle pillow.
Kids Sewing Project- 5 How to Sew Corners
On a piece of scrap material practice making 90 degree angles. Sew along the side to the corner. Instead of finishing each side to the end and taking it off the machine as we did in previous lessons, leave your thread in the material, needle down, lift up your presser foot and turn your material 90 degrees.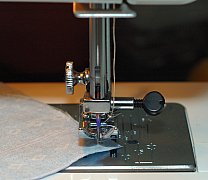
Put your presser foot down and continue on until you reach the end.
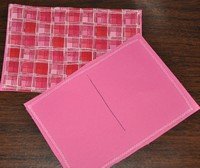
Practice sewing with this sew a card project.
Go back and try some of these previous kids sewing projects from Level 1or 2 such as a pillowcase, pillow, or beanbag. Sew the corners as stated above.
You can also do one of the following kids sewing project
Triangle Patchwork Pillow
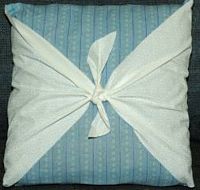
Pillow with a Tie Front
Tip: Work toward using the presser foot as your guide, this will keep you going straight when sewing corners and curves.
Beginning Sewing Projects 6- Basting
Basting is a very basic stitch and really should be what the kids start with on the machine. It's just the longest stitch length that your machine will do. Patterns tell you to baste stitch something mostly as a guide and then you can pull it out later. On a scrap material sew a basting stitch, check your sewing manual if you aren't sure how to change the stitch length. Sew different stitch lengths and compare the difference.How to Baste Sewing Video.
Beginning Sewing-Projects 7 - Changing a Needle
Learn how to change a sewing needle and choose a sewing needle. Most machines are the same in regards to changing a sewing needle. Check your sewing machine manual. Turn off your machine when changing your needle. Remove your needle.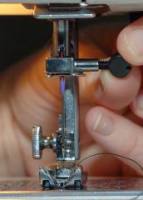
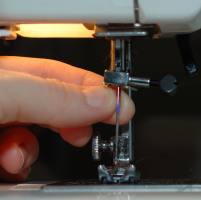
Replace the needle with the flat side toward the back. Different needles are used for different types of materials such as lightweight or heavier fabrics. Read your needle package for the correct size needle.
Beginning Sewing-Project 8 - Pockets
When you sew with patterns and make clothes, you will add a pocket by folding the edges of a rectangle and pinning to your material where indicated. Then sew along the edges. Sewing pockets is as easy as sewing a straight line and stopping where you need to stop. We will practice by making a pocket purse or bag where you will sew two pockets together.You can do a simple pocket project by cutting out two pieces of material about the size of a pocket. With right sides together sewing edges leaving one end open. Turn right sides out and pin open edge inside 1/4 inch. Pin pocket to a t-shirt and stitch pocket to t-shirt.
Now try a Pocket Purse Project.
Kids Sewing-Project 9 - Gathering Stitch
The gathering stitch will be easy and fun for kids to see that they can gather up material with the thread. It will take lots of practice to master sewing something gathered to something else. The gathering stitch can be used for making ruffles on pillows and other items, as well as gathering the skirt of a dress to the top.Practice sewing a gathering stitch on a square piece of material. First you will use the gathering stitch, or basting stitch which is the loosest stitch or longest stitch. See your sewing machine manual if needed. Sew the gathering stitch about 1/2-1 inch from the edge of a piece of scrap material. Pull the thread from the back of your material to gather your stitches closer together. Be careful not to pull the thread too hard or the thread will break and you will have to sew another gathering stitch.
How to Gather Sewing Video.
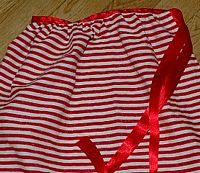
Continue practicing sewing and gathering on your scrap material, then make the following kids sewing project, a Gathered Apron or Skirt Apron.
The gathering stitch can be used for making ruffles on pillows and other items as well as gathering a shirt to a bottom of a dress.
Kids Beginning Sewing Projects
Do any of the following beginning sewing projects.I recommend using cotton or cotton blend materials at this point. Make sure you pre-wash your fabric. Look back at Level 1 or 2, if you haven't done these projects for more kids beginning sewing projects.
Easy Sewing Projects in this Level
Baby Receiving BlanketBandanna Tote Bag with an Inside Lining
Belt, how to sew a simple
Bottle Bag
Card, Sew a
Christmas Stockings
Circle Pillow
Couch Caddy
Dinner Placemat
Doll Blanket and Pillow Set
Dress Up Your Jeans
Foam Pencil Case
Gathered Apron
Glasses Case
Hair Bows
Hair Scrunchy
How to Sew Drawstring Bags
How to Sew Tote Bags
Jean Purse
Lap Desk
Neck Pillow
Patchwork Skirt
Patchwork Tote Bag
Patchwork Pillow Cover
Pillow Cover with Ties
Pillow with Trim
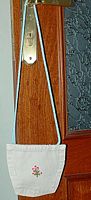
Pocket Purse
Sew a Pot Holder
Snack Baggie
Stuffed Ball
Tablecloth
Tshirt Drawstring Bag
Do you have a Beginner Sewing Project to Share?
Your Kids Sewing Project
Share your kids sewing project, instructions or pictures.
Reader's Submitted Projects
Click below to see contributions from other visitors to this page...
Easy Heart Pocket Pillow 
This is a fun project that would be great for Valentine’s Day, Christmas or a birthday. Add a little note, notebook, candy, or even a small stuffed animal …
Penguin Neck Pillow
The Comfortable Polka-dot Penguin Neck Pillow
Materials Needed:
* black and white polka-dot fleece
* white fleece
* felt scraps - orange and yellow …
Felt Tooth Fairy
Cut 2 Tooth shape pieces about 6 inches wide by 7 inches tall. Sew together both panels about 1/4" from edge leaving a 2 inch opening at the top. Stuff …
Elephant (or any other animal you like
Made by Nori, age 5
1- Draw an animal, cut it two times from fabric
2- Make tail from wool
3- Place the fabrics with the right side together, with …
Pretty Purse
1- Cut 2 squares of fabric 10 x 10 inches.
2- Cut 2 squares of fabric 9 x 9 inches.
3- Cut 2 strips of fabric 3 x 20 inches for handles.
4- Cut …
Cute Monster 
1) Cut out a fun shape from an old t-shirt or a piece of fabric.
2) Sew up the shape but make sure to leave a small space for stuffing your
monster. …
Polka - Dot Bear
Polka - Dot Bear
Materials Needed: 1/2 yard fabric (may be polka-dotted) thread
4 matching buttons …
Polka Dot Friends
Supplies needed:
Choose any color of fabric you like, my sister and I choose the colors pink and black; pink and black ribbon 1/4 inch wide, black thread, …
Follow Kids Sewing Projects


All rights reserved.
The material on this site is for educational purposes.
Nothing on this page is public domain.
